
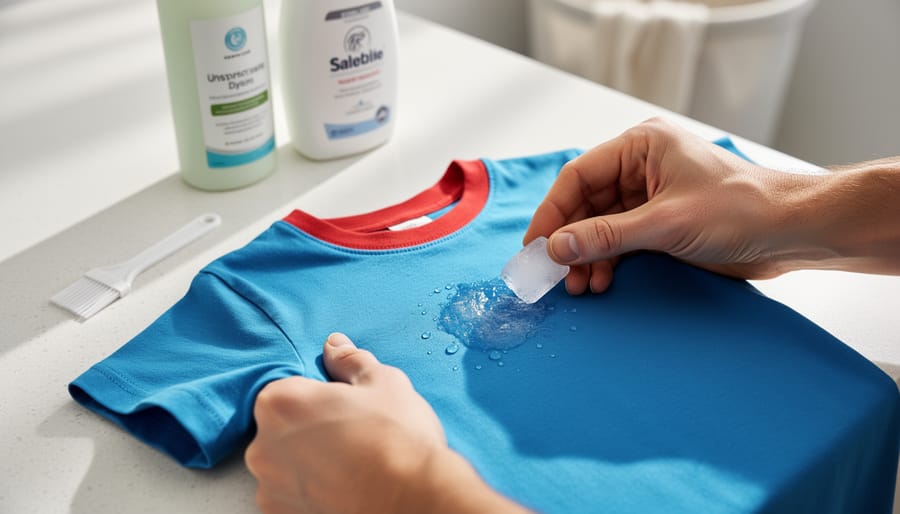
You can remove gum and sticky messes from kids’ clothes in about 15 minutes using ice, freezer time, or household oils paired with a gentle scraping tool and a quick wash. The key is hardening gum with cold (making it brittle and easy to lift) or breaking it down with fat-based solvents like peanut butter or cooking oil before laundering. Most parents succeed on the first try when they skip the instinct to scrub immediately and instead treat the gum with temperature or oil first.
I know that moment of discovery all too well. You’re folding laundry or helping your toddler undress, and there it is: a flattened wad of gum melted into their favorite shirt, or a smear of slime that somehow survived an entire playdate. Your stomach drops. You wonder if the garment is ruined. I’ve been there more times than I can count, standing at the washing machine with a stained pair of leggings in hand, Googling furiously while my daughter asks if her unicorn shirt is “broken forever.”
The good news? Getting gum out of fabric is far easier than it looks, and the same techniques work for slime, putty, stickers, and other sticky disasters that seem magnetically drawn to children’s clothing. You don’t need specialty products or a degree in stain science. What you do need is a little patience, the right approach for the mess type, and confidence that you can salvage that beloved piece of clothing without damaging delicate fibers or leaving a greasy mark behind.
Why Gum and Sticky Messes Are So Stubborn (And Why That’s Actually Good News)
That pink wad of gum embedded in your child’s favorite jeans isn’t just sticky, it’s chemically designed to bond to surfaces. Here’s the thing: gum contains synthetic polymers that soften with heat and burrow into fabric fibers, creating dozens of tiny anchor points. Slime works similarly, using long polymer chains that weave between threads. Sticker adhesive relies on pressure-sensitive compounds that form instant bonds when pressed. Even melted candy creates sugar-based links that harden as they cool.
But here’s why this is actually helpful: once you understand what makes each mess stick, you know how to unstick it. Gum needs cold to become brittle and break those polymer bonds. Slime responds to acids like vinegar that break down its structure. Sticker residue dissolves in oils or alcohols that weaken the adhesive. It’s not about scrubbing harder, it’s about choosing the right chemical counter-agent.
I learned this the hard way after my daughter left gum in her pocket and I tossed everything straight into the dryer. That heat didn’t just set the gum, it melted it into a permanent decoration across three shirts, her favorite leggings, and somehow the inside of the dryer drum. I spent an hour scraping dried gum while mentally calculating replacement costs. That disaster taught me what I’m about to share with you: the science behind the stickiness is actually your secret weapon. When you match your removal method to what caused the mess, you skip the guesswork and save both the clothes and your sanity.
What You’ll Need: Tools and Household Items That Actually Work
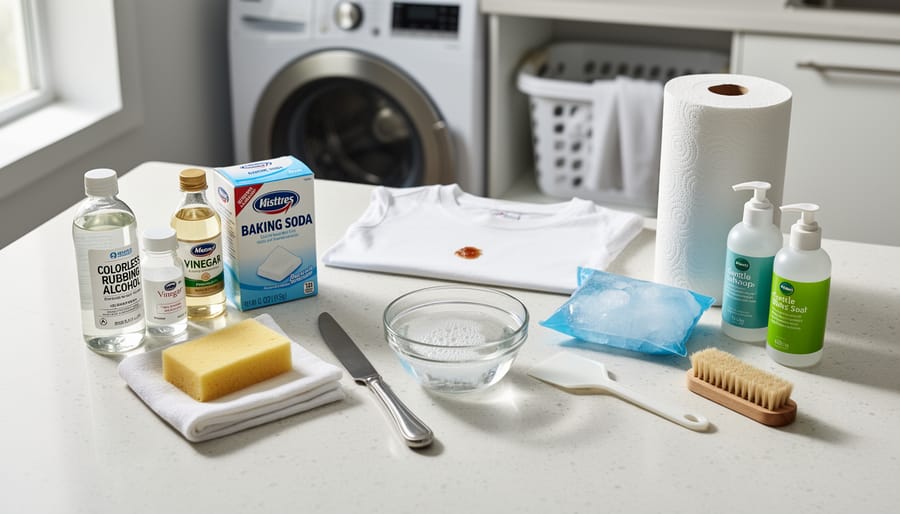
Before you panic-buy specialty stain removers, take a breath and check your kitchen and bathroom cabinets. You already own almost everything needed to tackle most sticky disasters. The secret is matching the right household item to the specific mess your child has created.
For Gum and Wax-Based Messes:
Ice cubes or a freezer bag do the heavy lifting here. Cold hardens gum so it loses its grip on fabric fibers, making it easier to lift away without spreading. You’ll also want a dull butter knife or old credit card for scraping, sharp blades can damage fabric threads.
For Oil-Soluble Sticky Substances:
This is where your pantry becomes surprisingly useful. Peanut butter (yes, really), cooking oil, or baby oil dissolve adhesives because sticky residues from stickers and tape are often oil-based. The oil breaks down the adhesive bonds without harsh chemicals. You’re fighting oil with oil, essentially.
For Water-Based and Food Stickiness:
White vinegar and dish soap are your workhorses. Vinegar’s acidity breaks down slime components, while dish soap (designed to cut grease) handles syrup, honey, and melted candy. An enzyme-based laundry pre-treatment spray tackles the protein and sugar molecules left behind.
For Stubborn Residue:
Rubbing alcohol (70% isopropyl) dissolves many adhesives that resist oil or water methods. Pack of baby wipes works in a pinch for fresh messes caught early. An old toothbrush helps work solutions into fabric weave without damaging the material.
Here’s your complete toolkit:
- Freezer space or ice cubes in a sealed bag (for gum, wax, some slimes)
- Peanut butter, cooking oil, or baby oil (for sticker residue, tape adhesive)
- White vinegar (for slime, some food messes)
- Dish soap and enzyme laundry pre-treatment (for food-based stickiness)
- Rubbing alcohol 70% (for tough adhesive residue)
- Dull knife, old credit card, or spoon (for scraping)
- Old toothbrush (for working in solutions)
- Clear packing tape (for lifting residue)
- Clean white cloths or paper towels (to blot and lift)
Most of these methods cost pennies compared to commercial stain removers, and they work just as well (sometimes better) because you’re using the right tool for the specific chemical makeup of each mess.
Important Safety Warnings Before You Start
Before you start tackling that gum or sticky mess, a few quick safety checks will protect both your child’s clothes and your family’s wellbeing. These aren’t meant to scare you, most sticky-mess removals go smoothly, but taking a minute for these precautions can save you from turning a fixable problem into a bigger one.
Start with a spot test on an inside seam or hidden area of the garment. Dab a small amount of whatever product you plan to use (rubbing alcohol, vinegar, oil) and wait a few minutes to check for color bleeding or fabric damage. This simple step takes thirty seconds but can prevent ruining an entire outfit. According to textile care specialist Maria Chen, acetone and strong solvents can dissolve certain synthetic fabrics or strip color from dyed materials, so testing first is non-negotiable.
When using rubbing alcohol or any product with fumes, work in a well-ventilated area. Open windows or step outside if possible, especially if you have young children nearby. Dr. James Patterson, a pediatrician with over twenty years of experience, notes that while these household products are generally safe when used properly, concentrated fumes in enclosed spaces can irritate sensitive respiratory systems.
Keep all treatment products out of reach during the process. It only takes a second for a curious toddler to grab that bottle of rubbing alcohol or cooking oil while you’re focused on scraping.
Know when to skip the DIY route entirely. Delicate fabrics like silk, wool, or anything labeled dry-clean-only should go straight to a professional cleaner. The money you spend on professional treatment is worth more than replacing a ruined garment or dealing with fabric damage that spreads during home treatment attempts.
Step-by-Step: Removing Gum from Clothes
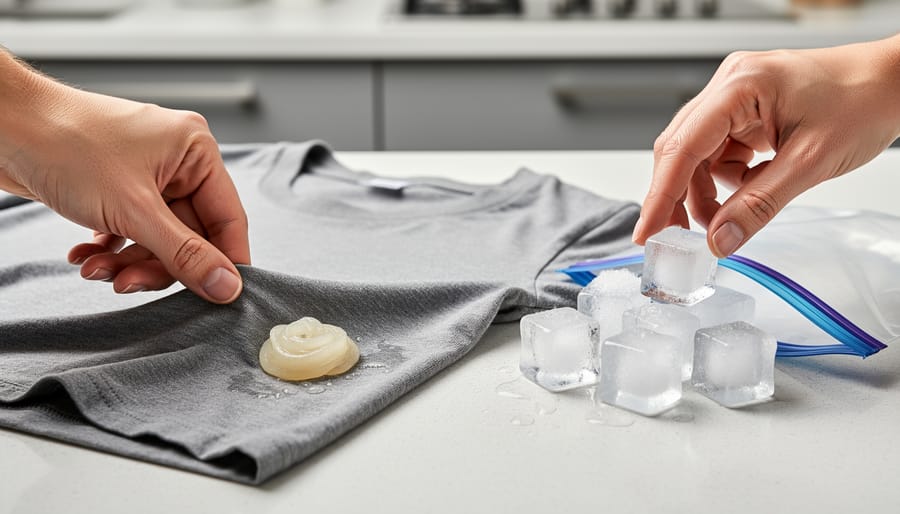
The freeze method is your best friend here because cold temperatures make gum hard and brittle instead of warm and stretchy. This works whether the gum is fresh or has been sitting there since yesterday’s playground adventure.
Here’s exactly what to do:
- Place the garment in a plastic bag and put it in the freezer for 15-20 minutes. If the gum is on a bulky item that won’t fit, hold an ice cube directly on the gum until it hardens completely. You’ll know it’s ready when the gum feels rock-solid to the touch.
- Remove the garment and immediately use a dull butter knife, spoon edge, or your fingernail to gently scrape the hardened gum away from the fabric. Work from the outside edges toward the center to avoid spreading it. The gum should crack and lift off in pieces rather than smearing.
- If any sticky residue remains (and it usually does), dab a small amount of peanut butter, cooking oil, or even mayonnaise onto the spot. These oils break down the remaining gum polymers that are clinging to the fabric fibers.
- Let the oil treatment sit for about five minutes. You can gently work it into the residue with your fingers if needed.
- Scrape again with your dull tool to remove the softened residue. Most of it should lift away easily now.
- Apply a small amount of dish soap directly to the area and work it in with your fingers or an old toothbrush. This cuts through the oil you just used and prepares the fabric for washing.
- Wash the garment in the warmest water that’s safe for that fabric type. Check the care label first, cotton can usually handle hot water, but synthetics often need warm or cold.
For delicate fabrics like wool or silk, skip the scraping part and go straight to the oil method, using very gentle pressure. With heavy fabrics like denim or canvas, you can be more aggressive with your scraping without worrying about damage.
One crucial tip: don’t put the garment in the dryer until you’ve checked that all the gum and residue are completely gone. Heat sets any remaining stickiness permanently into the fibers, turning a fixable problem into a play-clothes situation. If you still see or feel residue after washing, repeat the oil and soap treatment before you even think about the dryer.
Tackling Other Common Sticky Messes
Slime (Store-Bought and Homemade)
Slime requires a gentler touch than gum because vinegar breaks down its structure without freezing. Start by scraping off excess slime with a butter knife or old credit card, working from the outside edges toward the center to avoid spreading it further.
Mix equal parts white vinegar and warm water in a bowl or sink. Submerge the stained area and let it soak for 10-15 minutes. The vinegar dissolves the slime’s bonds with the fabric, you’ll see it start to loosen and float away. For stubborn spots, gently rub the fabric together underwater.
After soaking, rinse with cold water and check the area. If residue remains, apply a small amount of liquid laundry detergent directly to the spot and work it in with your fingers. Wash the garment in cold water on a regular cycle.
Glue-based slimes typically respond faster to vinegar than borax-based versions, which may need a longer soak. If you’re dealing with glitter slime, prepare for sparkles in your sink, they’re harmless but persistent. Always air-dry first to verify the slime is completely gone before using heat.
Sticker Residue and Labels
Sticker residue is sneaky, it looks removed until you notice that tacky patch left behind. Start by scraping off any remaining sticker pieces with your fingernail or a dull butter knife, working from the outside edges toward the center to avoid spreading the adhesive.
For most adhesive residue, rubbing alcohol works quickly. Dab a cotton ball or clean cloth with rubbing alcohol and press it against the sticky area for 30 seconds, letting it soak in. Then rub gently in circular motions until the residue balls up and lifts away. If you don’t have rubbing alcohol, cooking oil works too, apply a small amount, let it sit for a few minutes, then rub the residue away. Oil breaks down adhesive bonds surprisingly well.
Once you’ve removed the visible residue, apply a bit of dish soap directly to the spot and rub it in to cut through any remaining oiliness. Wash the garment as usual in the warmest water safe for that fabric.
Sticky Food (Syrup, Honey, Melted Candy)
The good news about syrup, honey, and melted candy? They’re water-soluble, which means they’re actually easier to remove than gum or slime, if you act quickly and resist the urge to use hot water first.
Start by rinsing the affected area under cold running water from the back of the fabric. This pushes the sticky substance out through the surface rather than deeper into the fibers. Hot water is your enemy here, it can cook sugar-based messes into a permanent stain.
Once you’ve rinsed away the bulk of the stickiness, apply an enzyme-based stain remover or liquid laundry detergent directly to the spot. Gently work it into the fabric with your fingers or a soft brush, then let it sit for 15 minutes. The enzymes break down any remaining residue and help lift discoloration.
Wash the garment in cold or warm water (check the care label) using your regular detergent. Air-dry or check the spot before putting it in the dryer, heat will set any remaining sugar into a stubborn brown stain.
Tape and Bandage Adhesive
Medical tape and bandage adhesive leave behind a particularly frustrating residue, it feels tacky, attracts lint, and can irritate sensitive skin if it transfers back from clothing. The good news is that this type of adhesive responds well to oil-based treatments.
Start by applying a small amount of baby oil, coconut oil, or cooking oil directly to the sticky area. Let it sit for 3-5 minutes to break down the adhesive bonds. Gently rub the fabric together or use your fingernail to roll the residue away, it should ball up and lift off fairly easily.
Once the adhesive is gone, treat the oily spot with a bit of dish soap (which cuts grease effectively), rubbing it into the fabric before washing. Launder as usual in the warmest water safe for that fabric. Check the area before drying to ensure both the adhesive and oil stain are completely removed.
How to Tell If It Worked: Verification and Next Steps
Before you toss that shirt in the hamper and call it done, take a moment to check your work. Run your fingers over the treated area, it should feel smooth, not tacky or rough. Hold the fabric up to good light and look at both sides. Any remaining stickiness, sheen, or discoloration means you’re not quite there yet.
If the mess feels gone, inspect the spot for staining. Gum and sticky substances often leave behind oily shadows or color marks even after the sticky part lifts away. A light stain might still come out in the wash, but if you see anything concerning, treat it again before moving forward.
This is crucial, you really do need to avoid drying residue because once heat locks it in, that stain becomes a permanent feature. Air-dry the item first if you’re uncertain.
If your second attempt still leaves traces, you’ve got a choice to make. For everyday play clothes, a faint shadow probably won’t bother anyone. For special outfits or school uniforms, you might want to try one more method from the troubleshooting section or accept that this piece has graduated to “paint and playground duty only.”
Some stains genuinely won’t budge, and that’s part of raising kids who actually play and explore. You gave it your best effort, that shirt earned its battle scars honestly.
Quick Troubleshooting: When Your First Attempt Doesn’t Work
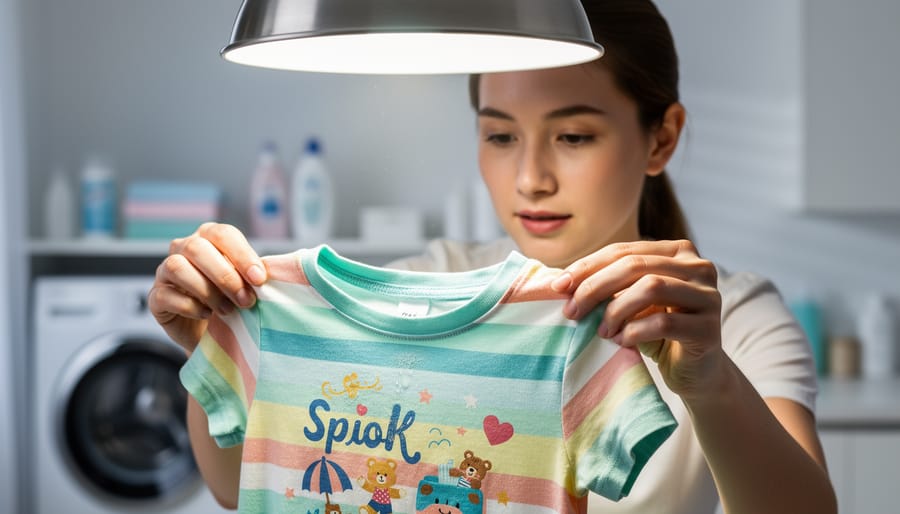
If your first attempt didn’t completely solve the problem, take a breath, this happens to all of us, and there’s usually a straightforward fix. The key is identifying what went wrong so you can adjust your approach rather than giving up on the garment. Learning to handle frustration in these moments makes the whole process less stressful for everyone involved.
Here’s what to do when you run into these common setbacks:
- Gum is still sticky after freezing: Put it back in the freezer for at least two hours this time, and make sure it’s in direct contact with ice or a frozen gel pack.
- Oily residue left behind: Apply dish soap directly to the stain, work it in with your fingers, let it sit for ten minutes, then wash in the hottest water safe for that fabric.
- Sticky mess spread to a larger area: Stop immediately and let the fabric dry completely before trying again, working with wet sticky messes almost always makes them worse.
- Fabric looks damaged or discolored: Stop all treatment right away and take the garment to a professional cleaner who specializes in stain removal.
Sometimes you’ll need to repeat the entire process two or three times, especially with particularly stubborn gum or slime. That’s completely normal. Between attempts, check that you’re using enough of the treatment product and giving it adequate time to work, rushing through the steps is the most common reason treatments fail the first time around.
Prevention Tips (Because We Can Dream, Right?)
Look, I’m going to be honest with you: no amount of prevention will stop every gum disaster. I learned this after implementing a strict “no gum in the house” rule, only to have my daughter come home from a playdate with an entire pack stuck to her favorite leggings. But a few simple habits can reduce the frequency of these crises.
Check pockets before everything goes in the wash. Make it part of your routine, like less bedtime stress it becomes automatic once you’ve done it enough times. Keep a set of designated “messy play” clothes for activities involving glue, paint, or outdoor adventures, and save the nicer outfits for less chaotic occasions.
Teach your kids where gum belongs when they’re done (the trash, not their pocket). Will they remember every time? Absolutely not. But they’ll remember sometimes, and sometimes is better than never. The same mindset that helps you stay calm through messes applies here.
If you’re serious about prevention, borrow some mess-proofing strategies from other high-risk situations. Accept that childhood and stains go together, and your stress level will drop considerably.
Common Questions About Removing Sticky Messes from Kids’ Clothes
Can you remove gum that’s already been through the dryer?
You can still remove gum after it’s been heat-set, but it’s harder and may require multiple attempts. Start with the freezer method to harden the gum, then carefully scrape away as much as possible before treating any residue with rubbing alcohol or an oil-based product. Be prepared that it might take two or three treatment cycles.
Are there fabric types that can’t handle these removal methods?
Silk, wool, rayon, and dry-clean-only fabrics need gentler treatment. Skip the rubbing alcohol and stick with ice for removal, or take the garment to a professional cleaner who can handle delicate materials safely. When in doubt, test any product on a hidden seam first.
Is it safe to use these methods on baby clothes?
Yes, but rinse and wash thoroughly after treatment to remove any product residue. Stick with gentler options like vegetable oil or vinegar for baby items rather than rubbing alcohol, and always do an extra rinse cycle. If your baby has sensitive skin, consider washing the item twice.
What about school uniforms or special occasion outfits?
For expensive or irreplaceable clothing, professional cleaners are worth the cost if you’re nervous about DIY methods. If you do treat it yourself, test your chosen method on an inside seam first and work slowly rather than rushing the process.
Here’s the reality check nobody tells you: gum in hair and gum on clothes require completely different approaches. Hair needs peanut butter or oil worked through the strands to break down the gum’s stickiness, while clothes need cold temperatures and scraping. If your child managed to get gum in both places simultaneously (and honestly, how do they even accomplish this?), tackle the hair first since that’s usually more urgent from a comfort standpoint.
The time-saving hack busy parents ask about most? Keep a dedicated sticky-mess kit in your laundry room with ice cubes ready in the freezer, rubbing alcohol in a spray bottle, and a dull knife or old credit card for scraping. Having everything in one place means you can treat messes immediately instead of hunting for supplies while the stain sets deeper. Those five minutes of setup save you twenty minutes of frustrated searching later when you’re already dealing with a laundry crisis.
You’ve made it through the sticky situation, and now you’re armed with the knowledge to tackle whatever gooey surprises come next. Whether it’s gum frozen and scraped away, slime vanquished with vinegar, or syrup soaked and washed clean, you’ve got this. These messes aren’t parenting fails. They’re badges of a childhood well-lived.
Some stains will come out completely. Others might leave faint shadows that only you notice. And honestly? Those little reminders tell stories, the afternoon at the park, the craft project that got wildly out of hand, the moment your toddler discovered the joy of stickers. Years from now, you won’t remember whether every shirt came clean. You’ll remember the laughter, the creativity, and yes, even the exasperated sighs that came with the territory.
Keep your freezer stocked with ice cubes and your laundry room stocked with patience. Check those pockets before wash day when you remember. Most importantly, give yourself grace when the inevitable happens. The fact that you’re here, reading this article and trying to save that favorite shirt, shows exactly the kind of parent you are, one who cares, who tries, and who keeps going even when things get sticky.
Now go forth with confidence. The next gum incident doesn’t stand a chance.